< Expansion Link Brackets >
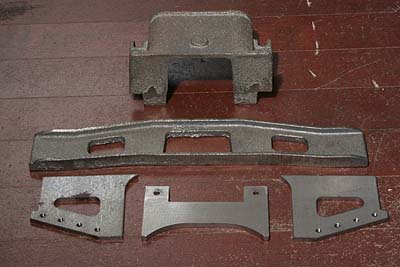
The photo shows parts for 'inside slide bar
support' which also hold the expansion link
brackets. The actual component is a complicated
single casting. So as to cast easier, I divided
it into two of castings and three of laser-cut
plates.
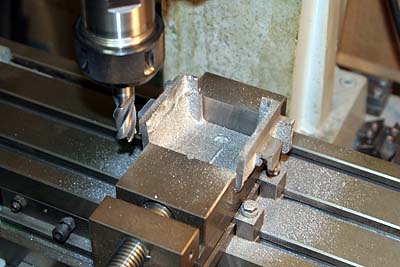
I started with the center dome casting. After
cutting front and back face parallel, the
casting is reversed and chucked in machine
vise. And then both bolting faces (side faces)
are milled to a width between the main frames.
Bolting face for the inside slide bar was
cut. The face is at the ceiling of the dome
and tilt at 7.5 degree. Note the angle plate
is tilt at the degree and hold the casting.
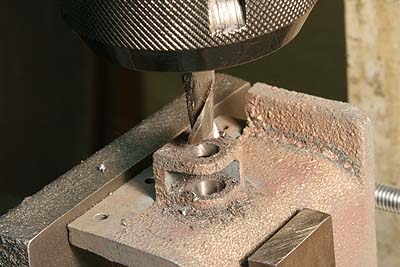
When opening holes for wheel spring hanger
pins, a problem occurred. Due to 'chill'
of the casting, surface hardness is ununiform
around the hole. As a result, the drill tip
slipped and the hole is opened in oval shape.
And the position was far deviated from the
punch mark. It is serious problem because
I will use a lot of cast irons with thin
profile.
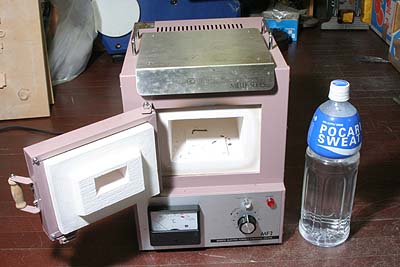
I obtained a tiny electric furnace in an
auction. Furnace size is 175x120mm. Heater
power is 700W. It is useful in many ways
but my purpose is just annealing cast irons
so as to remove 'chill'. Chilled iron can
be annealed by heating over 900 centigrade
and cooling slowly. Heating is easily done
with propane gas torch, but cooling slowly
is difficult. Electric furnace can 'cool'
the job in a desired speed.
Immediately the above casting was annealed.
The job was heated to 950 C in an hour, and
cooled down to room temperature for one night.
I tried to true up the oval hole by boring
with an oversize endmill. The casting surface
was a little hard but I could smoothly open
a clean hole. When assembly, I will reduce
the hole diameter with a bush.
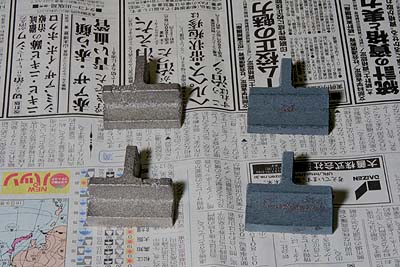
The photo shows before and after annealing.
The right hand castings are after annealing.
Casting surface is deeply oxidized by long
time heating. If you wish to avoid oxidization,
you must have a professional vacuum furnace.
The next is front plate casting. Back side
bolting face and both side edges are milled.
Both ends of the casting are shinning after
cutting. It is a sign of 'chill'! Unfortunately
the casting is too long to anneal by the
tiny furnace.
![]()
Holes for bolts were opened. To prevent distortion
of the hole by chill, I clamped a mild steel
bar onto the casting and drilled through.
It means the steel bar is employed as a guide
hole for drilling.
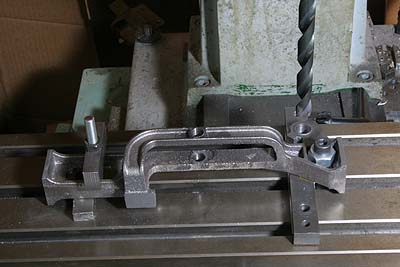
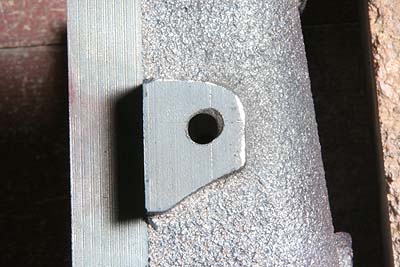
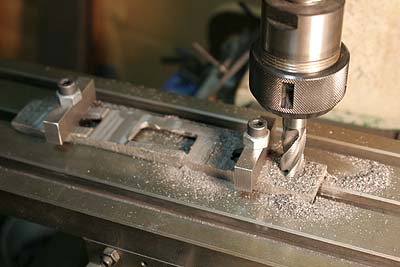
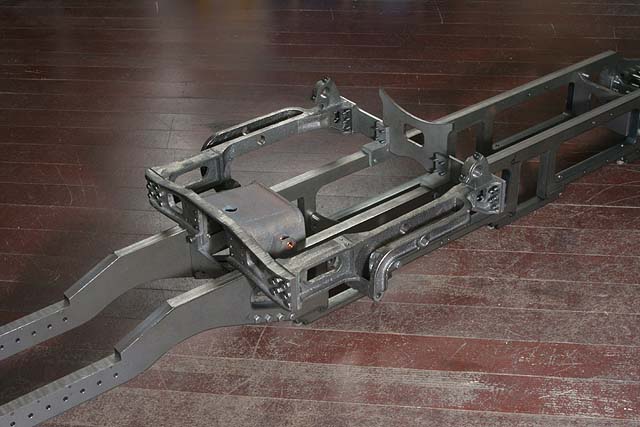
The expansion link brackets are machined.
Front, back, side and bottom faces are milled.
Expansion link hole and weighshaft hole are
drilled and reamed. All of operations are
controlled by X-Y coordinates of the milling
stage. There was no sign of chill.
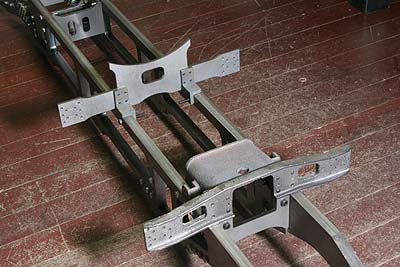
'Inside slide bar support' was assembled
between the main frames. And a back side
plate for the expansion link bracket was
mounted onto the frames with cross shape
castings. The distance between front and
back plate was determined by the expansion
link brackets.
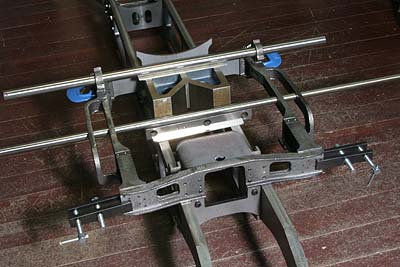
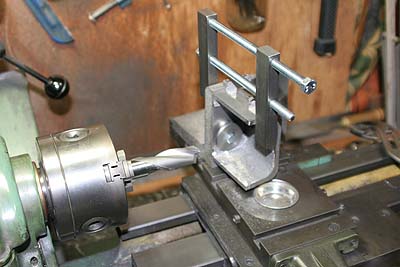
The pair of link brackets was aligned with
two round bars through each pair of holes.
The bars are maintained in a desired height
with suitable packing on the frame. And then
front and back bolting area are clamped firmly.
It needs 40 bolts to secure the brackets.
The inside 20 are screwed into the brackets
without nuts, while the outside 20 are through
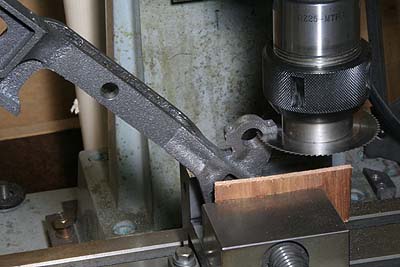
the hole and secured with nuts. The photo
shows drilling the bracket through the front
plate.
I divided the weighshaft hole with 0.3mm
metal saw. Before that, two screw holes beside
the main hole are opened. When assembly,
0.3mm brass sheet is used to pack the 0.3mm
thickness shortage.
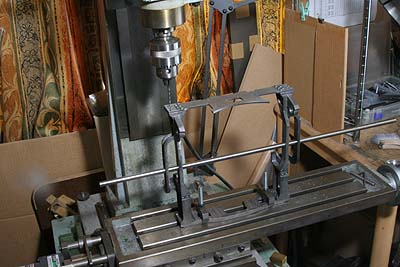
Expansion link brackets were assembled. The
whole job becomes more and more heavy!

In this month, I joined Shigiya miniature
railway meet. My William kept on running
over six miles in two days. Famous Kozo Hiraoka
also joined the meet. He took pictures of
William and sent them to me. I introduced
two of them in Photo Gallery.