< Rear Pony Truck 1 >
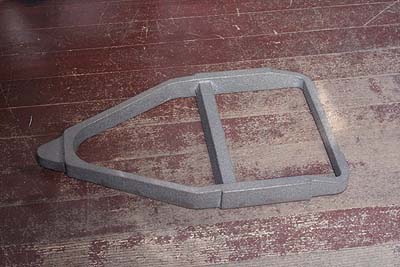
Rear pony truck has front and back frames
combined by axleboxes. I prepared one casting
for the two frames. The center beam of the
casting is only for reinforcement of cast
pattern.
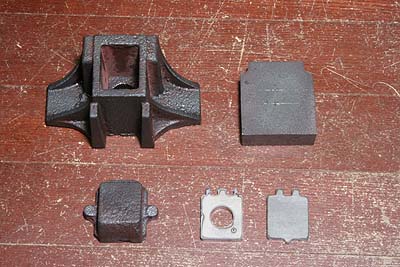
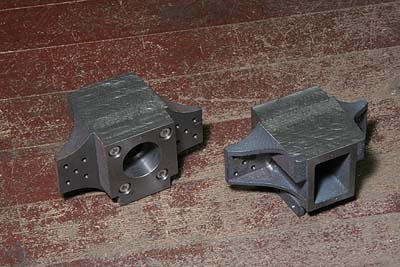
The photo shows all of materials for the
axlebox assy. I divided axlebox in two castings,
so as to ease casting. Also I separated the
flange from the oil pod, as a laser cut plate.
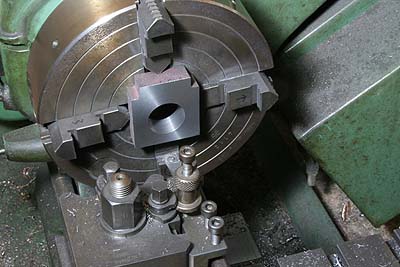
I started with inner axlebox. In four-jaw,
front and back faces are finished parallel.
Then the center hole for axle bush is finished
truly square.
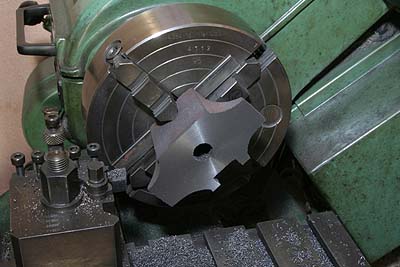
The outer axlebox is finished in the same
way.
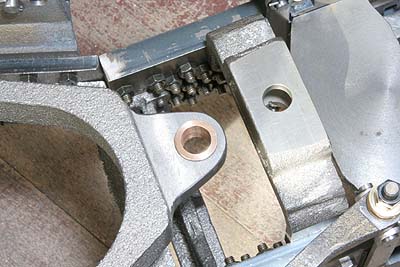
Inner and outer axlebox are clamped together.
Whole job is chucked in a vise. Then starting
hole for tapping is drilled. And step hole
to sink bolt head is cut by an end mill.
After that, only the inner (upper) part is
removed.
Screw hole is tapped in the outer (lower)
part. Other screw holes are opened here.
All of coordinates are controlled by X-Y
table.
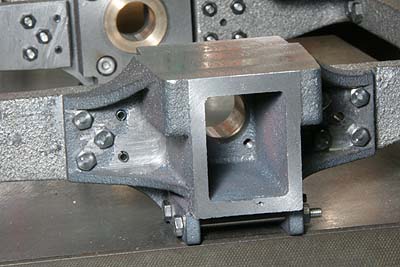
Top face of the assembled axleboxes is finished
by end mill.
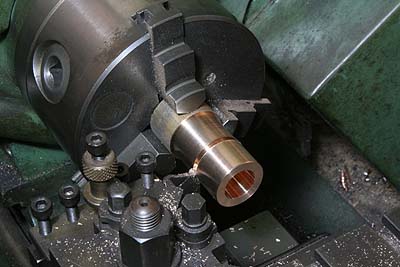
The bush is made from gunmetal rod. Inner
and outer diameters of the bush are finished.
Then two bushes are parted off one after
another.
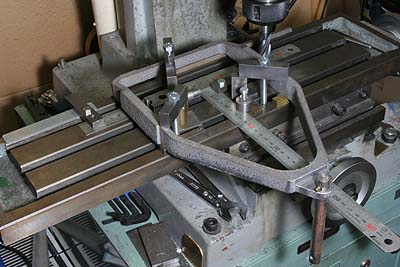
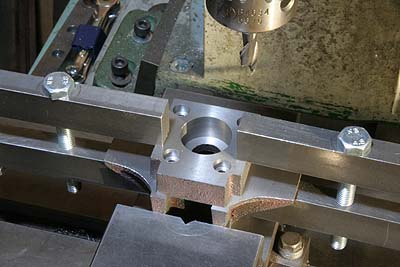
The photo shows how to align the large frame
casting onto the narrow miller's table. In
advance, two rules are fixed truly square
on the table. Pivot pin of the frame touches
an edge of the vertical rule. Thus the pivot
center's X-coordinate is transferred to the
horizontal rule. Then the bolting faces for
axlebox can be aligned equal from the center.
After that the bolting faces are finished
by end mill. Incidentally, the frame is clamped
in three positions with three packing. These
three points determine datum surface of the
job.

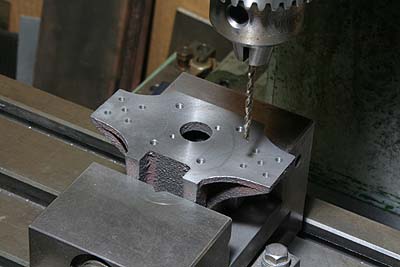
Axleboxes are separated again. Then the outer
axleboxes are aligned onto the frame. I used
a rule again to determine Y-coordinate.
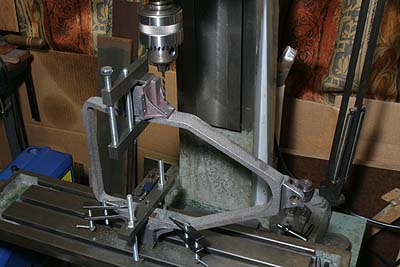
The frame is drilled through the axleboxes.
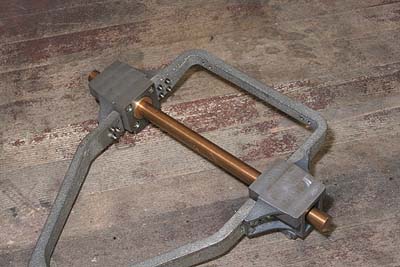
The frame is sawn and separated to front
and back parts. Re-assembled axleboxes are
bolted onto the frames. Note two roll pins
align the drilled holes truly. The bushes
are not glued yet.
With suitable round rod, two bushes are centered
and glued into the axleboxes. I used Loctite
603 to glue them.
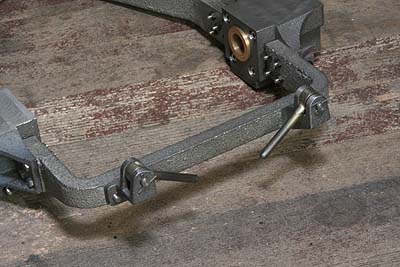
Push rods and brackets for 'side control'
are put on the back frame. Bolting faces
of both the bracket and the frame is trued
up. The push-rods are made in the same way
as the eye bolts of the equalizer.
Gunmetal bush for the pivot pin hole is glued.
Bush is not vital for pivot pin but I wanted
to omit spacing washers which make assembling
troublesome. The bush hole diameter is 5
% larger than the pivot pin, so as to allow
the rear pony truck to tilt in any direction.
Prototype C53 is semi matte black finish,
same as the William. For the William, I painted
stove enamel and baked. But enormous C53
is not easy to bake with a tiny infrared
heater. I searched substitute and some engineers
advised me to use polyurethane enamel paint
prepared for automobile, which is as hard
as stove enamel and heat-resistant for painting
smokebox.
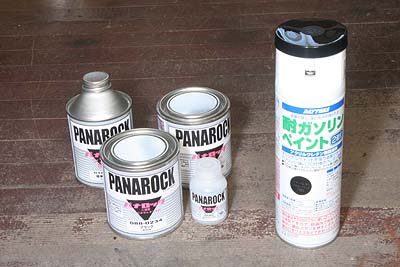
First I tried liquid type and disappointed.
In every time for paint, I will be bothered
to mix pigments, flat base, hardener and
thinner at defined percentages. I don't have
spray gun and compressor to begin with. Next
I tried aerosol type that has inside container
for hardener. Before use, you push its nozzle
hard, then the inside container is broken
and the hardener is mixed with other elements.
It is much easier to use but you have to
use up a canister within 24 hours after mixture.
After all I decided to use the aerosol type,
because I found suitable semi matte black
in its color variation.
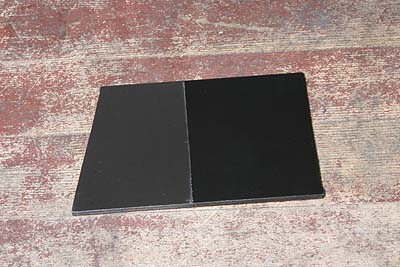
The photo shows test piece of the paint.
The left half is stove enamel for William,
and the right half is polyurethane enamel.
Both of them are semi-matte finish but the
urethane's black color comes out very well.
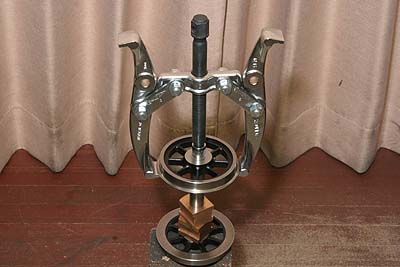
The bogie truck wheels were already painted
with stove enamel. For re-painting, I have
to remove the wheels from the axles. I employed
'gear puller' for this operation, with heating
back side of the wheel by propane torch.
After that I removed stove enamel by suitable
thinner and painted polyurethane enamel together
with the rear pony truck wheels.