< Flanging and Bending >
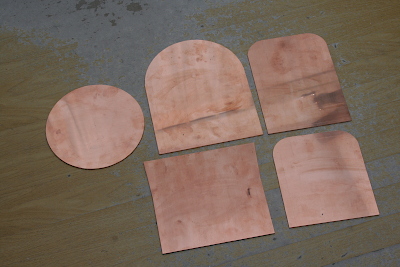
The flanged plates are cut from 3 mm copper sheet. Each has 5mm reserved area at its bottom for finish. Necessary width for each flange is calculated from thickness center of the flange. As an exception, throat flange of the throat plate needs excess width because it is expanded with flanging process.
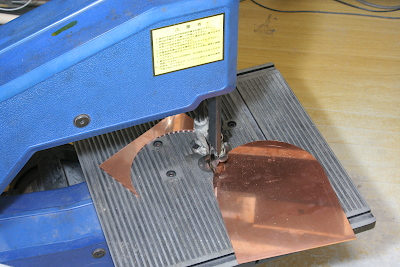
They are cut out by the band saw. Rough surface of slice is not cleaned here.
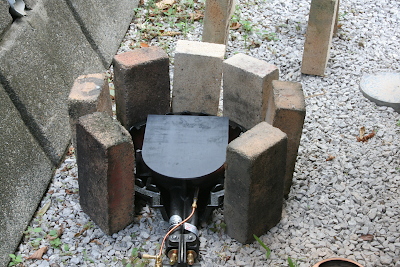
Anneal each plate with the cooking stove. It requires more than 400 centigrade to anneal copper. The stove is not strong enough to the temperature. So I employed a cassette gas torch as a support.
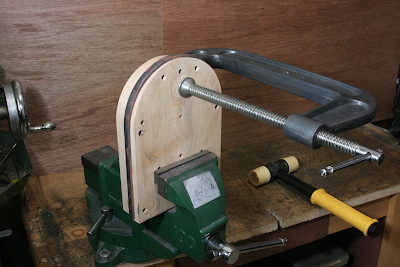
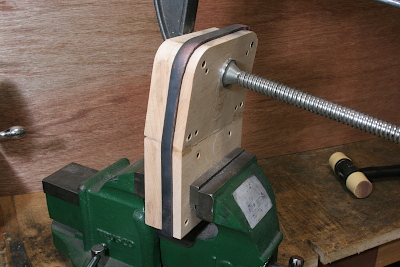
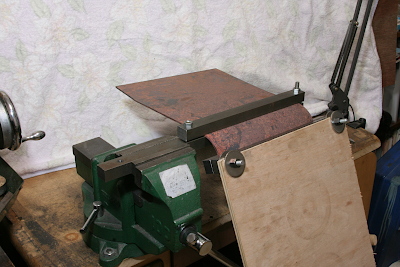
Sandwich each plate between a former and a backing plate and form flanges with a plastic hammer. The photo shows flanging the backhead. Note the whole job is chuck in a bench vise and supported by a large c-clamp. Bending angle after one annealing is 15 degrees at most. So it needs a number of annealing to bend to 90 degree.
The firebox tubeplate is slightly folded at middle by an angled former and two separate backing plates. After that the flange is formed with many annealing.
The first flanging operation of the throat plate is the same as the firebox tubeplate.
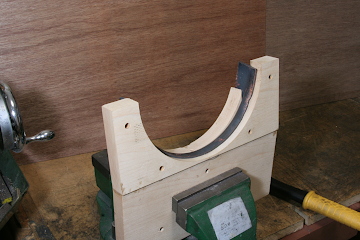
Hear a half circle for the throat flange is cut out. If it was cut out before the first flanging, the half circle shape were distorted by hammering.
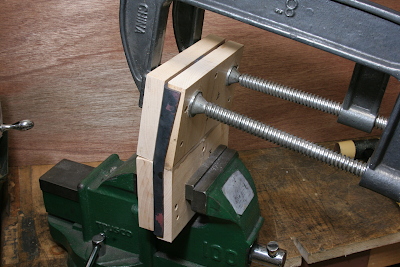
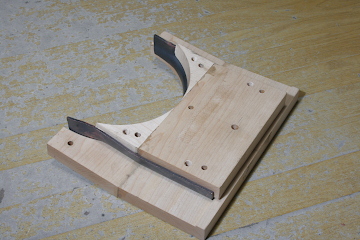
In order to form the throat flange, the plate is sandwiched between two formers. It is the most difficult flanging part and requires over and over annealing. I utilized a steel hammer and a steel round bar as a medium. The smaller of the two formers is the same as the first former for the parallel flanges except a cut out of a half circle.
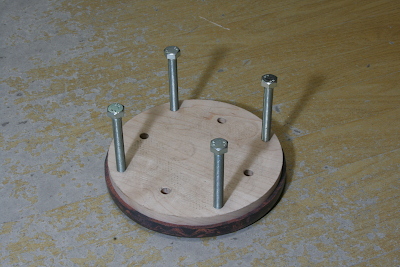
As the smokebox tubeplate is fully surrounded by the flange, it is difficult to remove the wood former after flanging. I employed four lift-up bolts for removal.
The annealing repeat count of each flanged plate is as follows. Count for the throat plate is divided into the parallel flanges and the throat flange. The reason of large number for the firebox tubeplate is because it was annealed comparatively low temperature. The throat flange required a number of annealing with all high temperature annealing.
Smokebox Tubeplate: 12 times
Backhead: 10 times
Firebox Backplate: 16 times
Firebox Tubeplate: 11 times
Parallel Flanges of Throat Plate: 6 times
Throat Flange of Throat Plate 24: times
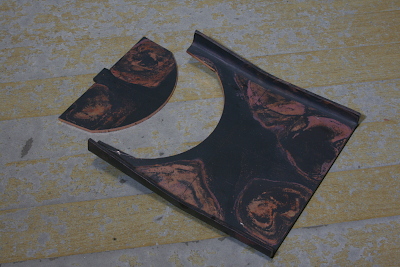
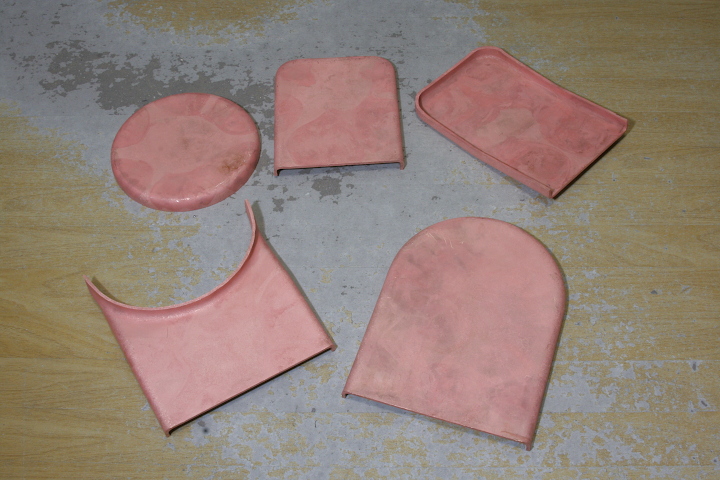
The finished flanged plates after pickling.
Here I introduce a caution of the flanging process. In the following sections, figure A is a normal condition. If you rush to complete a flanging and hit relatively outer part of the flange, only the outer edge lands on the former and root part of the flange is floating, as figure B. If the flange is milled to flat from this condition, as figure C, thickness of the flange root becomes insufficient. Therefore, after flanging, flatness of the flange should be checked with a square.
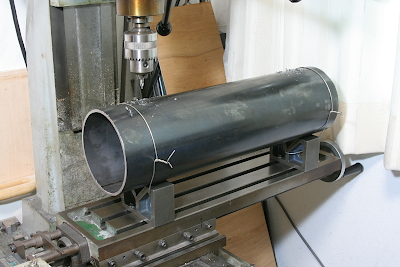
The barrel is rounded from a copper sheet by bending rolls. Left and right edges of a sheet are pre-rolled in advance. I utilized a steel pipe for this operation. The photo shows drilling holes for screws on a steel pipe.
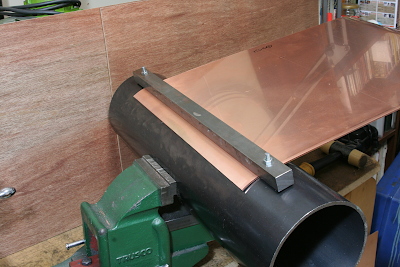
Cut out a copper sheet for the barrel and fix its edge on the steel pipe with a flat bar, and then round the edge with a plastic hammer. Here only the edge is rounded.
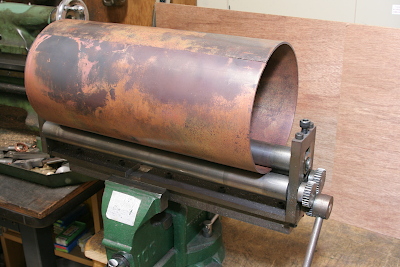
Round whole body with the home made bending rolls. It required only two times annealing. The barrel is divided into two bodies and I prepared two barrels here. Also a half round roof of the outer firebox is rolled in the same manner. After rolling, slight free-hand adjustments are required.

The open ends are patched with a copper band plate. The photo shows drilling an invisible band plate through the barrel. Drill 1.6 mm dia. through holes, extend holes on the barrel to 2 mm dia., and tap the holes on the band plate to M2. They are assembled with brass M2 screws.
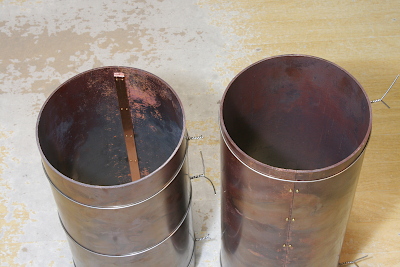
The barrel's diameter is determined by the horizontal length of the plate before bending. The two barrels will be joined by telescopic joint. Each diameter is calculated so that there is 0.1 mm play in radius between two barrels. As a result, the fitting is smooth and not sloppy.
The photo shows bending a shoulder of the inner wrapper. I did not use any former like a round bar. Both straight parts next to the round part is held by two pairs of flat bars and the round part is bent freely until 90 degrees. Then I get desired radius due to the round part width before bending. It also required two times annealing.
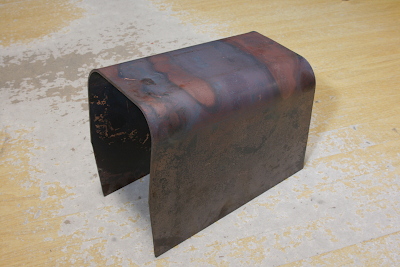
The both shoulders were bent and final shape of the inner wrapper appeared. If the dimensions are reasonably true, additional slight hammering will eliminate any gap after fitting both flanged plates.