< Silver Soldering Operations #1>
The first series of silver soldering operations were carried out. It is difficult to do them at home because of noise problem. Therefore I rent a club member's factory. It is relatively long way from home, so I will try as many operations as possible at a time.
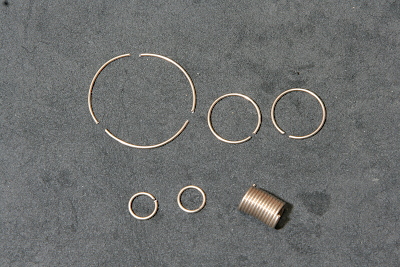
The silver solder is BAg-1 (Easy Flo). I obtained 1.6 mm dia. and 1 mm dia. wire. For soldering stays, flues and tubes, I prepared silver solder rings. The 1 mm wire is coiled in the lathe and cut into the rings. Only the rings for the large flues are cut into three pieces in each.
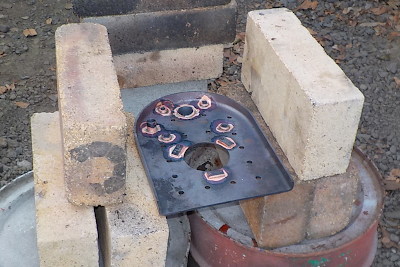
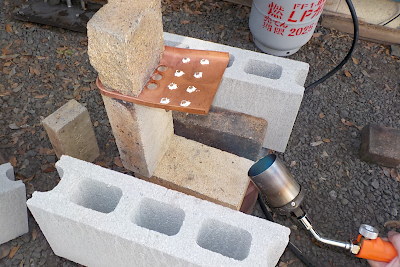
Solder the bushes on the backhead. Before soldering, the small bushes are fixed by crushing copper surface and the regulator flange is fixed by small screws. Note three small plates soldered around the fire hole. They are to reinforce the three screw holes to fix the firehole door assembly.
Solder the firebox back plate on the inner wrapper. Short pieces of silver solder are put along the inside flange of the backhead, and then heat up whole job from outside of the firebox. As a result, thermal insulation with bricks isn't necessary because the propane torch is enough strong.
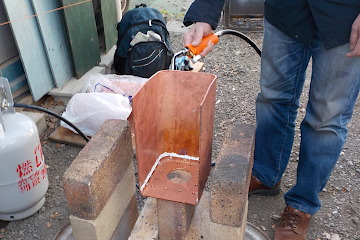
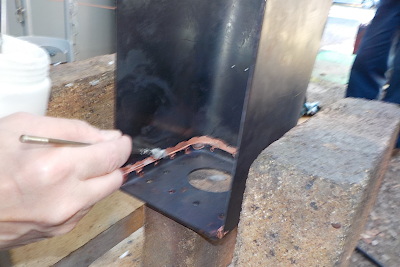
Some pieces of solder fell out from the flange, so I added solder and flux and heated again. After soldering, I found that the gap is partly too wide. I guess the rivets were not perfectly crushed and the gap was widened by heat. It will cause a problem later.
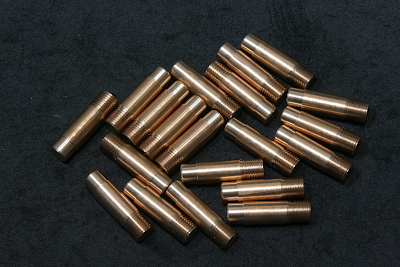
The front and back stays are made from 7 mm dia. phosphor bronze rod. One end is threaded to M7 x 0.75 and the other end is stepped to 6.4 mm dia.
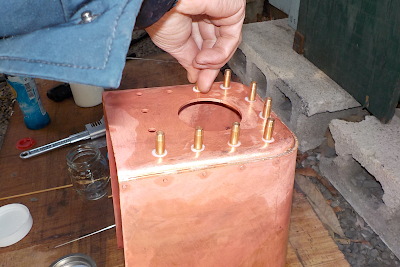
The backstays are screwed into the firebox backplate with flux.
The backstays and the firehole ring are silver soldered. I did it with backside up in order to pour additional solder along the outer flange from outside.
Solder the front stays on the firebox tubeplate. The stays are screwed in from below, put silver solder on top and heat from below.

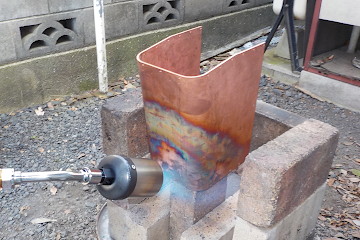
Solder the bottom of the barrels. Line up short pieces of silver solder along both sides of the band. And then heat up from bottom until the silver solder melts and perfectly penetrates. In addition I heated from inside but it nearly misfired due to lack of oxygen.
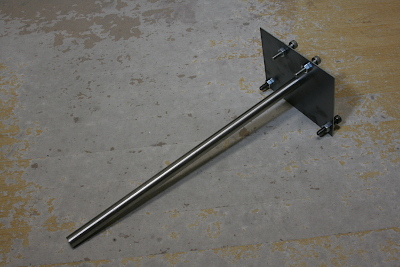
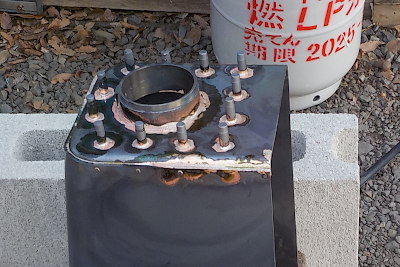
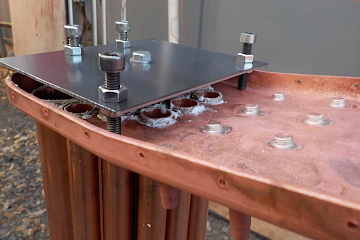
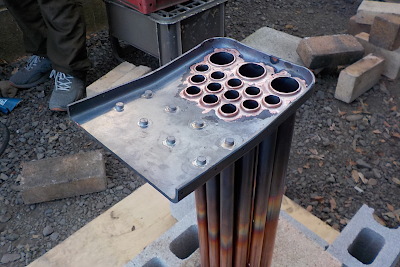
The photo shows a jig to arrange the flues and tubes in desired angle. Put the long rod part into a specified tube and set angle of the tubeplate by pushing four bolt heads against the tubeplate. Front ends of the flues and tubes are supported by the smokebox tubeplate. Therefore all of flues and tubes are set parallel one another during the soldering.
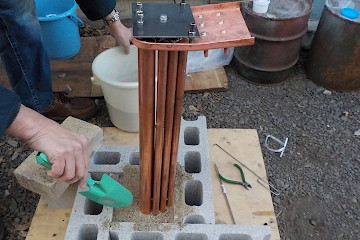
Set the flues and tubes in desired angle, surround the flues, tubes and the smokebox tubeplate by four brocks and fix them with sand. This setup comes from Kozo Hiraoka's Rio Grande K-27 construction issues. Finally the jig is removed gently.
After soldering, check from below that the solder penetrates and forms rings around all of flues and tubes. If you found any defects, add solder and heat up again.
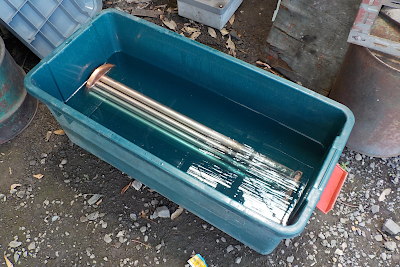
Pour into 10 % dilute sulfuric acid for a few minutes and remove oxide film. The factory has a pickling container for model locomotive boiler but is relatively short for my long boiler. Only the flues and tubes spend the full length.